Updating Smarter, Not Harder
I recently visited a liquidation bin store—you know, one of those places where unsold items from big retailers end up in giant bins, and everything is priced at $1, $5, or $8 depending on the day. It’s part chaos, part treasure hunt. One section had pre-packed boxes labeled “Mystery Boxes” for $50. I watched a couple tear into one right after checkout, excited to see what was inside. They seemed thrilled with the jumble of random cords, knick-knacks, and doo-dads.
That’s exactly how I used to feel running Rock RMS updates—clicking “Install” with my fingers crossed, hoping I’d opened a treasure chest and not a Pandora’s box. Thankfully, there’s a much better way to approach updates.
Just like with testing workflows and registrations (which we covered in our last article), updating Rock without a plan can lead to unexpected chaos. A structured approach lets you roll out new versions with confidence—not guesswork.
Keeping your database up to date ensures access to the latest security patches, new features, performance improvements, and compatibility fixes. In just the last four months, Rock has released five updates (from 16.7 to 17.0)—each one packed with valuable enhancements.
But staying current isn’t always easy. Without a plan, keeping your system in top shape—and ensuring a smooth experience for your users—can quickly become overwhelming.
Clicking “Install” and hoping for the best, like it’s a mystery box? Probably not the best strategy.
Tools That Power a Smooth Update
To take the guesswork out of your update process, you’ll want to use a few built-in Rock tools that help manage timing, communication, and installation. These tools are referenced throughout the steps below, so here’s a quick preview of what we’ll be using:
Leveraged Rock Tools
- Rock Update - Check for the latest version and install with one click. (Admin Tools > General Settings > Rock Update)
- Jobs Administration - Use the Rock Update Helper job, to manage updates behind the scenes.
- HTML Block - Add a simple HTML alert to your Home page to notify users of upcoming updates and expected downtime.
Overview of the Process
In the sections below, we’ll walk through a reliable step-by-step strategy for updating your production site successfully—using key Rock tools to plan, test, and implement with confidence. Each item is anchored for easy navigation—click to jump directly to the section you need:
- Review Your Planning Resources
- Consider a Development Site
- Test, Research and Report Bugs in Development Site
- Schedule the Right Time to Install Updates in Production
Step-by-Step
Step 1: Review Your Planning ResourcesRock RMS offers several built-in resources to help make update planning easier and more predictable.
Start with the Release Roadmap to view projected timelines and preview what’s coming. For a deeper dive into each version’s content, bookmark the Release Notes page. It’s a go-to resource packed with tools to support your planning.
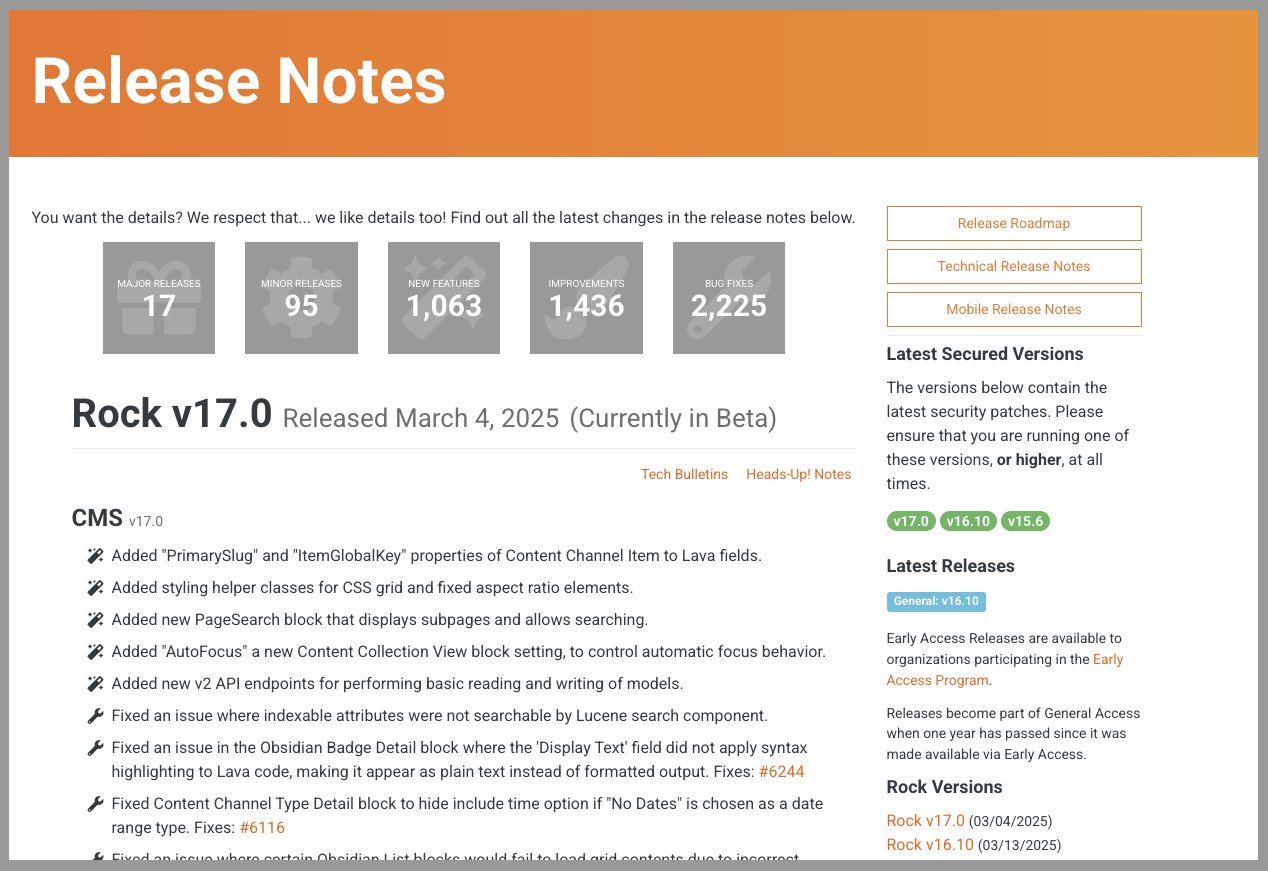
From the Release Notes page, you can:
Even if you're not ready to upgrade right away, staying on a secure version ensures your environment remains protected—without moving faster than your team is ready for.
These tools help you stay informed, avoid surprises, and prepare your team for upcoming features before they reach your live environment.
Step 2: Consider a Development SiteOnce you’ve mapped out your update timeline, there’s one more key ingredient to consider—where you’re testing everything before it goes live.
Set up a development site that mirrors your production environment. It’s your testing sandbox—a safe space to experiment, check permissions, test plugins, and preview changes without touching live data. It also acts as a backup snapshot in case something goes wrong.
Is your head spinning at the thought of setting this up? Don't worry—we've got you. Click "Contact Us" below and we'll help you get a development site in place, no sweat.
Step 3: Test, Research, and Report Bugs in Development SiteBefore clicking that “Install” button, run through a few key testing steps to avoid surprises.
🔄 Prepare Your Development Site
- Back up your production environment and restore it to your dev site.
- Update the dev site to the version you're planning to install. (Follow the steps mentioned in 🧘♀️ Space Out Updates below.)
- This gives you a realistic space to catch issues before they affect real users.
🧪 Test Across Departments
Assign testing tasks by ministry area using a shared doc. Download the checklist at the end of this article to get started.
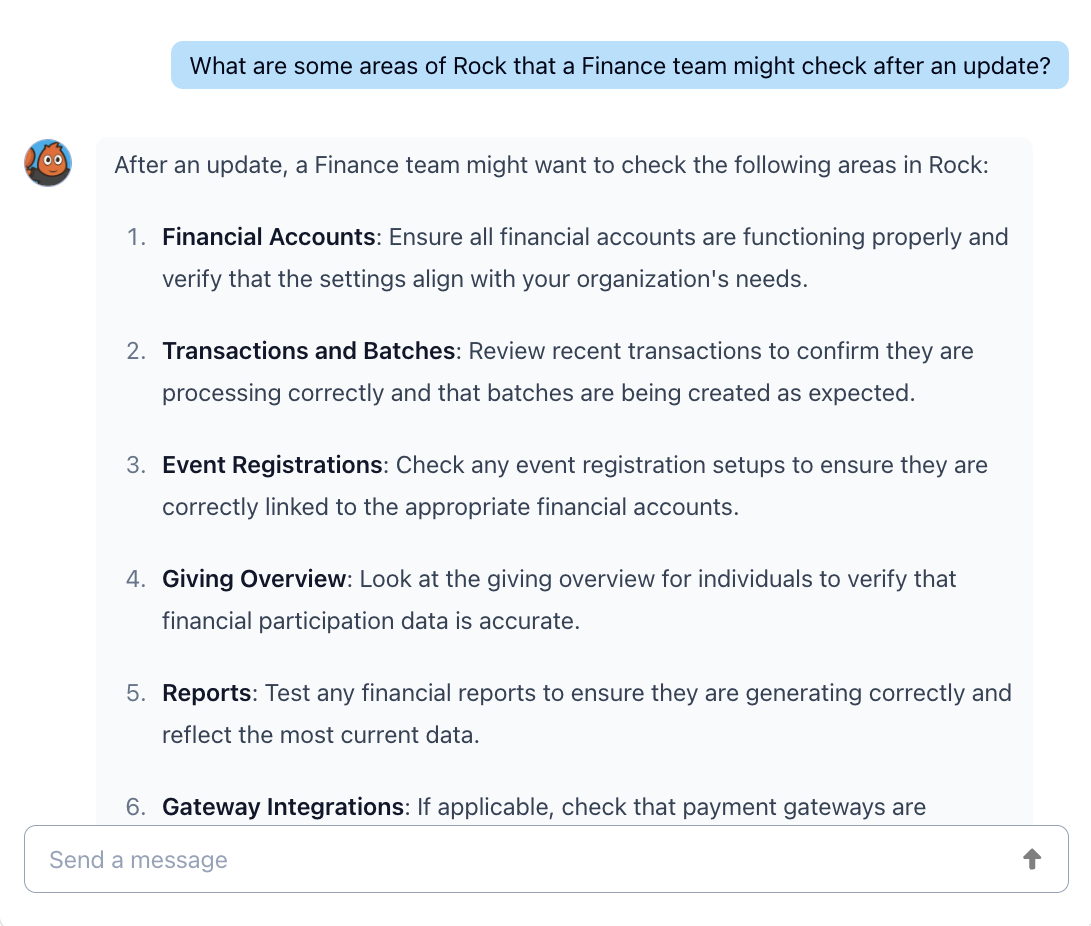
- Finance
- Small Groups
- Adult Ministries
- Children’s Ministries
Each team should:
- Review key pages and features
- Click through every interactions (check-in, registrations, financial tools, etc.)
- Report back what's working—and what's not
If something breaks:
- Determine whether it's a bug or a customization conflict
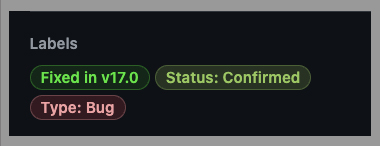
- Check the Rock RMS GitHub Issues page to:
- See if the issue has been reported
- Identify which version(s) include a fix
Not sure what to look for or where issues might pop up? You're not alone. We've walked through plenty of Rock updates and know the common trouble spots. Click "Contact Us" below if you'd like a hand testing in your dev site before going live.
Step 4: Schedule the Right Time to Install Updates in ProductionOnce your testing is complete and everything checks out, you’re ready to move forward with your production update.
Here’s how to help it go smoothly:
1. 🛎 Add an Alert Banner
Use an HTML block to display a banner on your homepage with the planned update time and date. This keeps users informed and cuts down on confused support requests.
2. 🕗 Update After Hours
Run the update outside of normal operating hours to minimize disruption and give yourself time to troubleshoot. (Admin Tools > General Settings >Rock Update).
3. 🧘♀️ Space Out Updates
If you're updating through multiple versions (like from 16.5 to 16.10), update incrementally with short pauses between versions to avoid compounded issues.
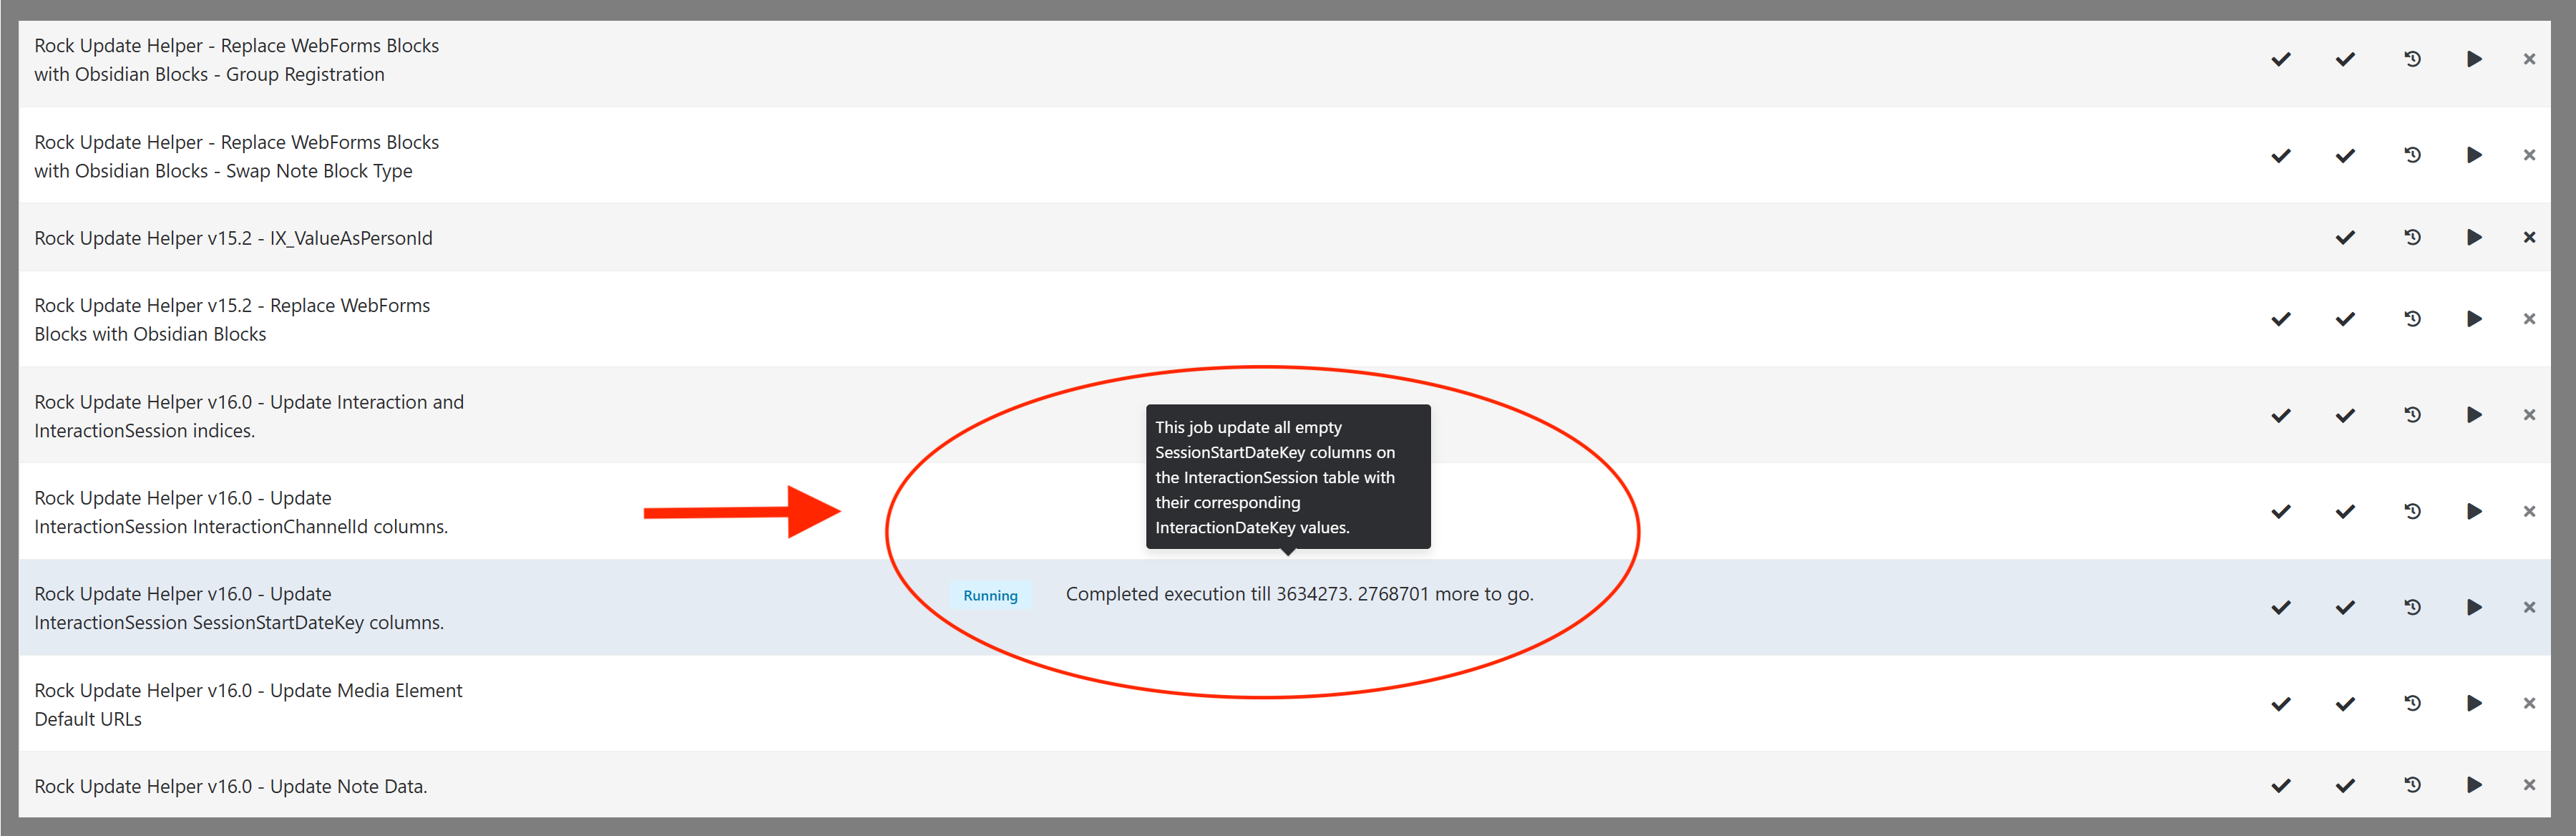
- Before moving to the next update review System Jobs to make sure nothing is still running.
- Starting in Rock 15.0 the Rock Update Helper was implemented to manage the update process. Make sure this job has run successfully before installing the next version. (Admin Tools > System Settings > Jobs Administration > Rock Update Helper)
4. 👀 Double-Check Everything
Once the update is complete, take time to walk through Rock and ensure everything looks and functions as expected. Use a checklist to help each ministry team review the areas of Rock they rely on. You can download a sample checklist at the end of this article—developed with input from Chip—to guide your teams through the process. Want to build your own? Create your checklist with Chip here.
5. 🔌 Check for Plugin Updates
Some plugins may require updates to stay compatible with the latest Rock version. Be sure to check for and install those right after updating.
Where to Start
Updating Rock doesn't have to feel like opening a mystery box. With a solid plan, the right tools, and clear communication across teams, you can roll out updates smoothly and confidently—and if it still feels overwhelming, we're here to help. Click "Contact Us" below to start the conversation.
Not sure where to begin? Just start small. Here are a few simple ways to take the first step:
- Visit the Rock Release Notes to see if your database is up to date—or to find out which version you’re currently running.
- Review your development site. If it hasn’t been refreshed in a while, consider syncing it with your production environment.
- Create a checklist for teams to review key areas after an update. You’ll find a sample checklist at the end of this article.
- Start the conversation with your team about building a structured testing process or planning your next Rock update.
Looking Ahead
Don't miss next month's blog, Turning Cards Into Conversations
Let’s explore the often-overlooked power of the Connection Card and challenge ourselves to rethink how it’s used. From evaluating whether to go digital, to streamlining duplicate forms across ministries, to improving follow-up and safeguarding data, each question helps uncover opportunities to better connect with guests and congregants alike. By assessing the process behind the card—not just the card itself—we can turn a simple form into a meaningful tool for engagement, care, and next steps in someone’s spiritual journey.
Download Update Checklist For Ministry Teams here.